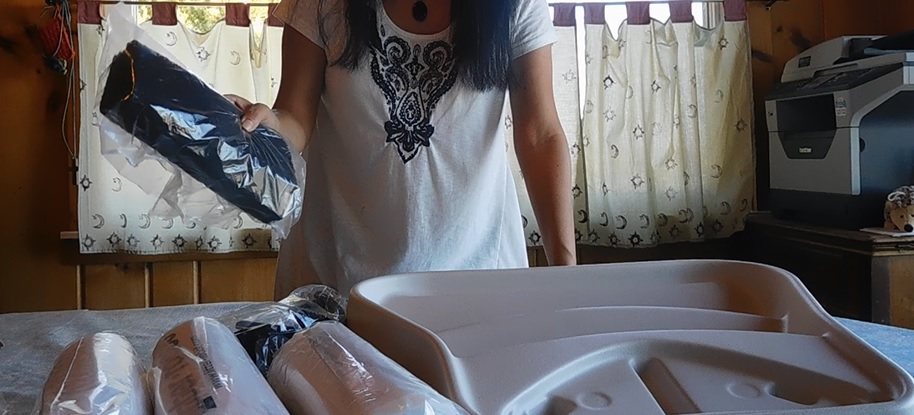
The accessories for the Litter-Robot 3 are optional, and they are designed to optimize the performance of your unit, either the Open Air or Connect. You know that this auto litter box works excellently in taking care of the scooping task but if you add some of these accessories this machine gets to perfection. Some of these items are complements to upgrade the litter box, such as the Ramp and Fence and others are optional supplies, such as liners and litter. You can get the any of the following accessories on this link.
|
Check the Litter-Robot 4! There is a top-notch version that is ideal for multi-cat households, the Litter Robot 4! It’s Wi-Fi powered like the Litter Robot Connect review but it brings great new features! Visit my review of the Litter Robot 4 and learn about these great improvements. |
Litter-Robot 3 Ramp Review
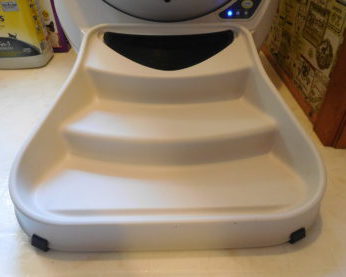
I wanted the Ramp because my cat Sophie was creating a mess when jumping out of the Litter Robot. Most cats enter the unit by stepping on the step without any problem, but exiting the litter box is a different story.
My First Impression of the Ramp
The Ramp is lightweight but made from very solid plastic. It features rubber feet for stability when your kitty steps on it. The Ramp fits smoothly in the recessed mount of the step and the mat fits exactly right in the recessed mount of the Ramp as well, very well designed.
This accessory is a good option if your cat jumps out of the litter box instead of stepping on the step when exiting the unit. When cats jump out, they carry litter on their paws that get spilled onto the floor, creating a mess. By placing this ramp all that litter attached to your cat’s paws goes to the ramp instead of onto the floor. The rubber mat on the Ramp will help to remove that excess litter from your cat’s paws and the ridge around the perimeter of the ramp contains the spilled litter. To clean it, jump grab the Ramp and tilt it to make the spilled litter go to the corners and then dump it back to the Litter Robot.
Installation of the Ramp
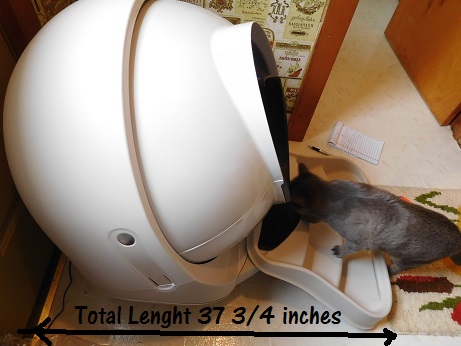
This Ramp is designed to fit on top of the step of the unit, using the existing black step mat. The installation of this accessory doesn’t need special tools. You only need to remove the black rubber mat of the step to uncover a recessed mount for the Ramp. Place the smaller end on the step and put the black step mat in the recess of the Ramp. The total length of the Litter Robot with the Ramp installed is 37 3/4 inches. Consider this new length on the current area where you have your Litter Robot.
VIDEO HOW TO INSTALL THE RAMP
When I installed the Ramp my cat was very hesitant to the point of not using the litter box. I figured I needed to encourage her to use the Ramp so I put treats on it. She immediately stands up on the Ramp to eat the treats and felt confident enough to stand on it. After she got used to standing up on the Ramp, she started using the Ramp without a problem. In the following video, Sophie is entering the unit and steps on the Ramp for the first time without me using treats. To empty the waste drawer simply lift the Ramp and set it aside. You don’t need to remove the mat at all. Open the waste drawer as usual and place the Ramp back on.
SOPHIE USING THE RAMP FOR THE FIRST TIME
Pros and Cons of the Litter-Robot 3 Ramp
PROS
- It reduces litter from spilling onto the floor
- It keeps the litter area much cleaner
- It helps elderly or disabled cats access the litter box
- It looks really nice
- The ramp is steady with non-slip feeet to keep it in place
- Sturdy, good quality
- If fits smoothly into the Litter Robot
CONS
- The cat may not use the Ramp right away, you may need to use tricks (that’s my cat anyway)
- It uses more space
Verdict
I recommend the Litter Robot Ramp because it keeps the litter area much cleaner. My cat Sophie created a mess that I had to clean almost 2 times a day and now the litter area is cleaner and all that spilled litter goes into the Ramp. Get the ramp for your Litter Robot here.
Litter-Robot 3 Fence Review
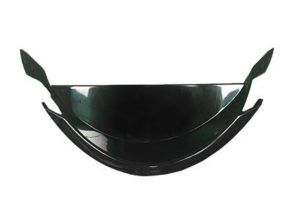
The fence has two purposes: to ensure your cat’s full entry into the litter box, prevent your cat’s tail from hanging out of the box, avoiding “accidents” when doing its business. The other purpose is to serve as a barrier to block kicked litter from going onto the floor or Ramp. In my particular case, I needed the fence to stop some litter from coming out of the Litter Robot, it was not so bad because my cat doesn’t dig too much but I figured I would try just to see the difference and there is a big difference on spilled litter, especially if you have a heavy digger.
The fence adds 1.25 extra inches to the lip, making the lip higher which allows it to stop some litter from going outside. Additionally, it helps to discourage cats from pointing their butts in that direction.
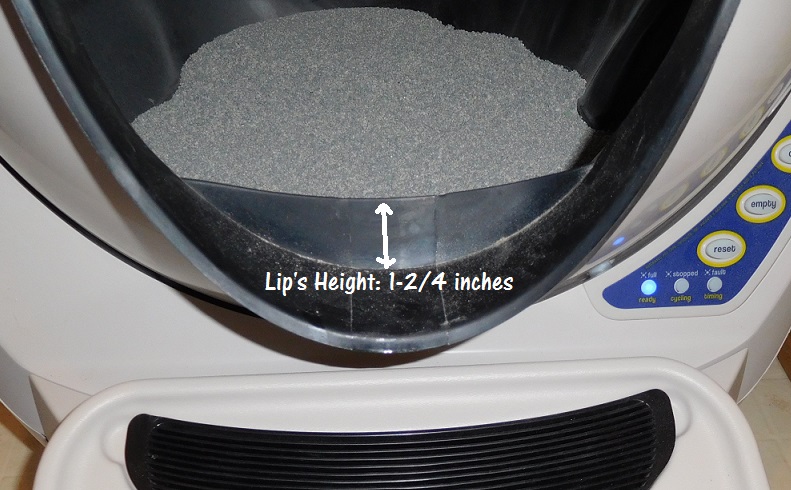
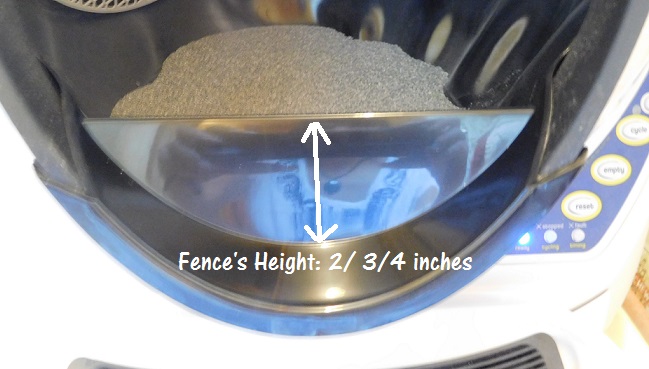
The fence is made from hard plastic, a really quality material and it’s not toxic. The Fence is easy to clean, you only need to remove it from the Globe and wash it with mild detergent.
The Fence is simple to install, it doesn’t need tools. Simply fasten the Fence onto the bottom of the Globe and it’ll start working as a barrier. When installing the fence, make sure to attach very well the sides and bottom latches, also the fence line must be perfectly horizontal and not diagonal. Here I made a video to show you how easy is to install the fence:
HOW TO INSTALL THE FENCE
MY CAT ENTERING THE LR WITH THE FENCE INSTALLED
Pros and Cons of the Litter-Robot 3 Fence
PROS
- It reduces spilled litter from going onto the floor or ramp
- It discourages cats from pointing their butts against the entry
- It helps to contain some urine if you have a high sprayer
CONS
- The plastic is hard, and not flexible when installing
- You have to install it perfectly horizontal, otherwise, the fence could detach from the Globe when rotating
- Taking off the fence from the Globe loses up a little the rubber
Verdict
If your cat is a heavy digger and litter kicker or if your feline friend has frequent “accidents” on the entryway of the Litter Robot I recommend you to get the Fence. If your cat doesn’t dig too much and it doesn’t have the problems mentioned above the fence it’s not that necessary.
Litter-Robot 3 Carbon Filter Review
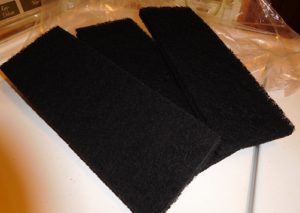
The carbon filter gets inserted into the vents of the waste drawer of the Litter Robot, absorbing odors. You can remove and replace the carbon filter when washing or emptying the waste drawer.
Frequency of Filter Replacement
The frequency of change of the filter depends on your cat’s use of the litter box and your preference. The manufacturer suggests changing the filter every 3 months, but with one cat and good odor control clumping litter the carbon can last for up to a year. In my case, I went a full year with the filter that came with my Litter Robot and I just changed it.
I must mention that the frequency of changing the carbon filter will depend on the food you feed your cat. Foods with by-products make cats create more stinky feces so this will be an important factor when replacing them. I found that the carbon filters really help to eliminate odors from the waste drawer and they last a long time. It’s important to mention that the filter is optional and the machine doesn’t require it to operate. The pack includes 3 carbon filter pads.
VIDEO HOW TO CHANGE CARBON FILTER
Pros and Cons of the Carbon Filters
PROS
- They really help to eliminate odors from the waste drawer
- They last a long time
CONS
- You need to clean the waste drawer from carbon dust when changing the carbon filter (it’s normal to get carbon dust when changing the filter though)
Verdict
I highly recommend using the carbon filter because it really eliminates the odors from the waste drawer.
Litter-Robot 3 Liners Review
These liners fit perfectly in the waste drawer and they will help you to reduce plastic contamination into the environment so if you want to reduce plastic waste on our planet, these liners are your choice.
These liners come in rolls of 25, 50, and 100 and they are compatible with all Litter Robot versions. To give you an idea, a pack of 50 liners will last about one year with a single cat and 100 liners will last easily over a year with 2 cats.
The dimensions of the liner are 23.5” x 29” and it has a usable capacity of 9-11 gallons.
HOW THE LINER FITS IN THE WASTE DRAWER
Pros and Cons of the Liners
PROS
- It reduces plastic waste in the environment
- They fit perfectly with the waste drawer
CONS
- More expensive than kitchen bags
Verdict
I recommend the liners if you are ecologically conscious and don’t mind paying more than kitchen bags.
Backup Battery kit Review
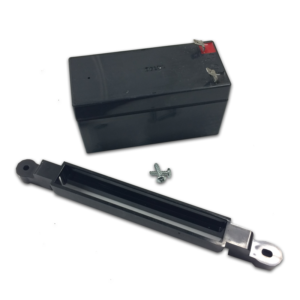
This addition is very helpful if you live in an area with frequent power outages. This battery allows the unit to work for up to 48 hours without electricity. I decided to get the battery backup because we have had a lot of rains and bad weather lately and I like to prevent problems before they come. I wouldn’t like to have my cat alone at home without the Litter Robot working.
The duration of this backup battery depends on how often your cat uses the litter box and if you use it with two or more cats. On average, with 2 cats the battery provides approximately 10 cleaning cycles per day. With my cat Sophie, this new feature will provide up to 20 cleaning cycles which is excellent and gives me peace of mind that my cat will have her favorite litter box always clean no matter what.
The Litter Robot battery backup includes:
- 1 x 12 VDC, 1.3 Ah Battery | 1 x Battery bracket | 2 x screws | Manual Installation Guide
How the Install the Battery
Even though the battery backup is really easy to install, I was not comfortable doing it myself so I asked for help (but when I saw the installation, I could have done it myself with no problem).
- Step 1. The first thing you need to do is unplug the unit.
- Step 2. Remove the Bonet, the Globe, and the waste drawer.
- Step 3. Locate the sticker on the back wall of the base. You need to see the serial number there. If this number is between 0-933 you will need to connect the RED lead to the BLACK terminal and the BLACK lead to the RED terminal. On the other hand, if the serial number is 934 and above you will need to connect the RED lead with the RED terminal and the BLACK lead to the BLACK terminal. This is mentioned in the Installation Guide as seen in the image:
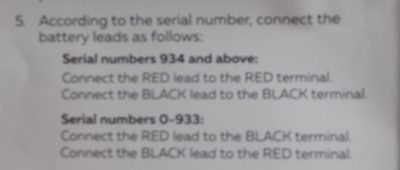
In our case, the serial number was above 933 so we had to connect the leads and terminals of the same color.
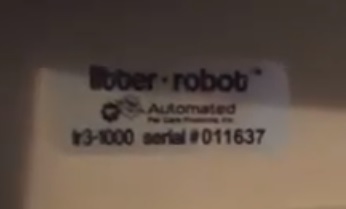
- Step 4. Tilt back the Litter Robot base carefully and find the battery compartment. Remove the leads from the tapes.
- Step 5. Connect the leads and terminals and place the battery inside the compartment.
- Step 6. Put the battery bracket and screw it. You will need a small star-bit screwdriver.
VIDEO HOW TO INSTALL THE BATTERY BACKUP
Pros and Cons of the Backup Battery
PROS
- Very easy to install
- It allows the unit to keep operating during power outages, up to 20 cycles with one cat
- Safe location of the battery
- With a screwed bracket to support the battery
CONS
- I haven’t found one so far (if I do I will post it)
Verdict
I recommend the battery backup to ensure your machine will be working at all times no matter if your area experiences power outages. This is an extraordinary feature that you and your call will appreciate, especially if you need to go on a trip and leave your cat alone. You can get the battery back up for the Litter-Robot 3 here.
Seal Strips Review
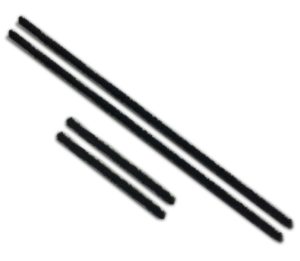
The strips seal the waste drawer so no smell leaks out of the litter box. The seal strips can be replaced if you see them worn flat but you can extend their lifespan by trimming them. Special care when cleaning the base of the litter box because if the strips get wet they could peel up. To keep them working better you can vacuum them or use a lint roller to remove lint and hair.
The seal strips are optional and the Litter Robot doesn’t require them to function, but they can become a life changer if your cat creates a really stinky waste. Personally, my Litter Robot doesn’t stink but I like to change these strips just in case my unit starts leaking smell from the waste drawer.
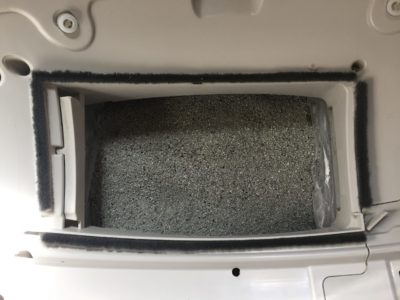
How to install the Seal Strips in the Litter Robot
Connect Upgrade Kit Review
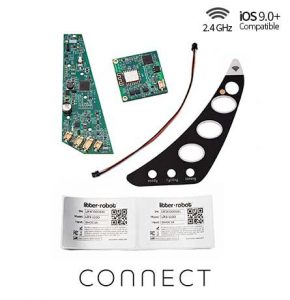
The Connect Package is a kit that allows you to upgrade your current Litter Robot 3 to make it a Smart Wi-Fi automatic litter box, working exactly like the Litter Robot Connect. Once you install this accessory properly you will be able to manage all the functions of the control panel from your Smartphone. Currently, the Connect is working with iPhone only but Android is coming soon.
This kit is the alternative for people who already bought the Litter Robot Open Air but want to enjoy the features of the Connect App. All you need to do is install the card that comes in the kit and replace the panel sticker and that’s all. You can find more details on how to install the kit in the Connect Litter Robot review.
Pros and Cons of the Connect Kit
The advantages of installing the kit in your current Litter Robot are that you can:
- Enjoy the features of the Litter Robot Connect
- Check the waste level so you know when to empty the litter box
- Manage 2 Litter Robots with the same App
- Check how many times your cat uses the litter box
- Manage all settings from your Smartphone
The disadvantage of this kit:
- Could be a little tricky to install for someone not handy
Now you have all the information you need to get the right accessory for your Litter Robot so your cat can enjoy an upgraded machine!